Seeded rye sourdough

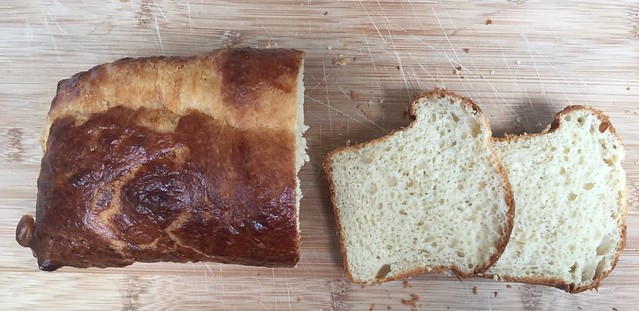
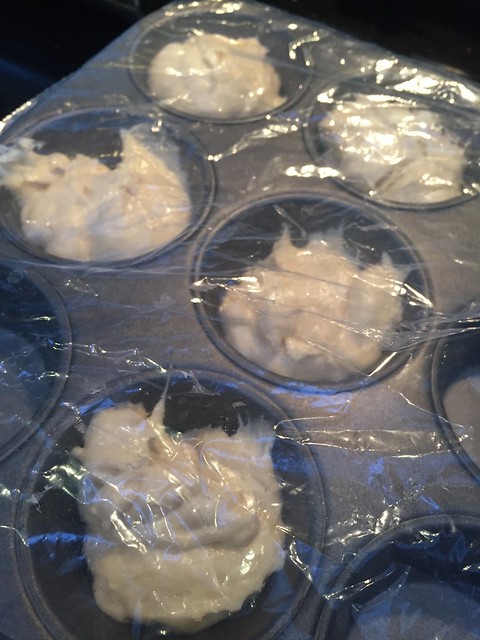
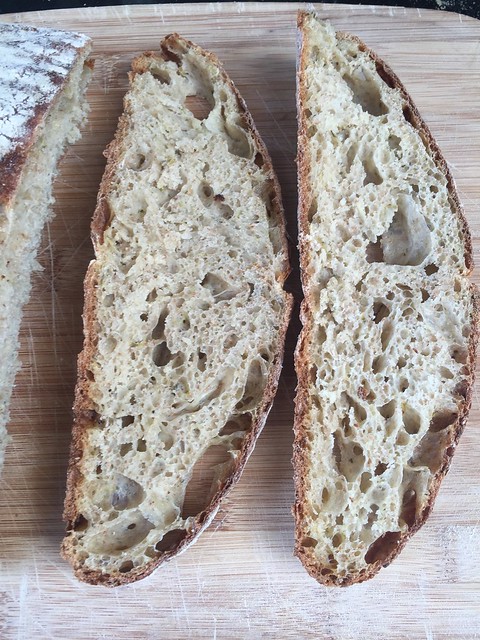
Been busy with lots baking as we go back in lockdown. Found the best recipe for sourdough muffins on baking sense website. The muffins were delicious. The sourdough pizza also look amazing, so does the sourdough buns, sourdough pitta bread, sourdough donuts, sourdough coffee cake ….. Actually I want to do all the sourdough recipes. So plenty to keep me busy for the next couple of weeks.

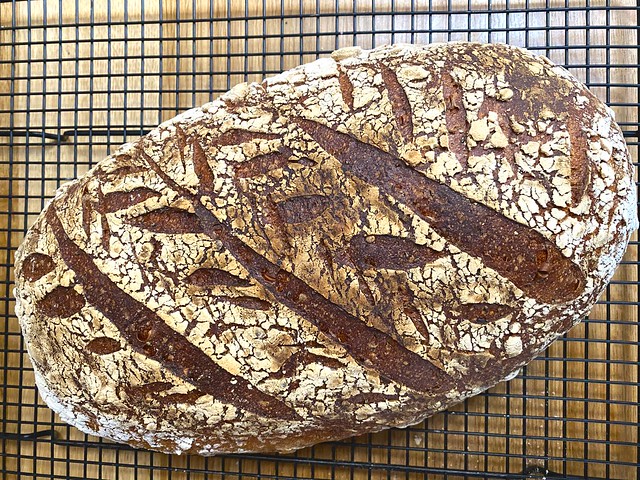
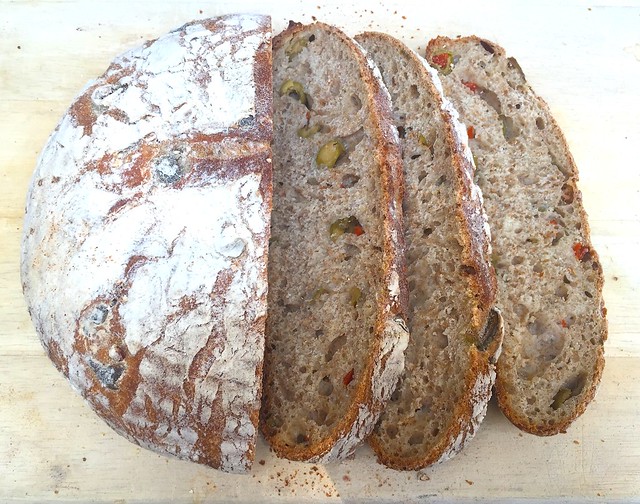
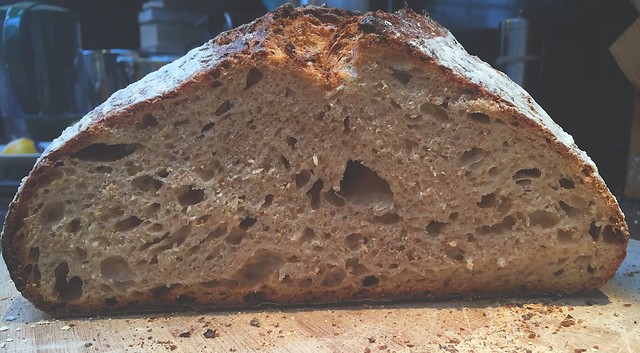
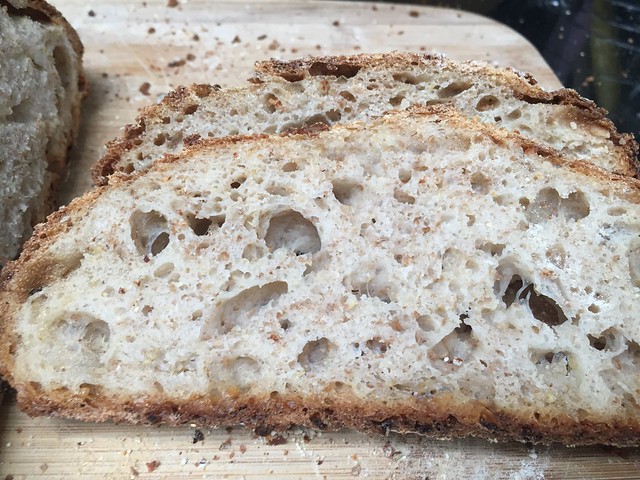
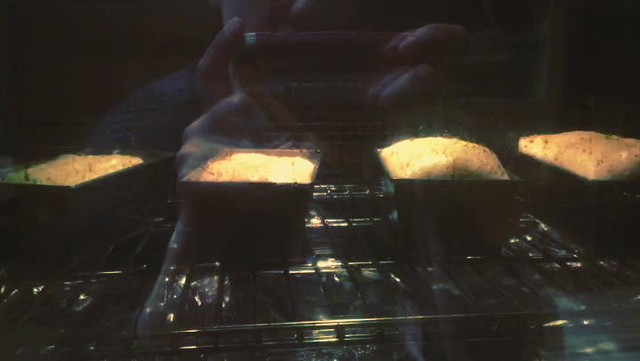
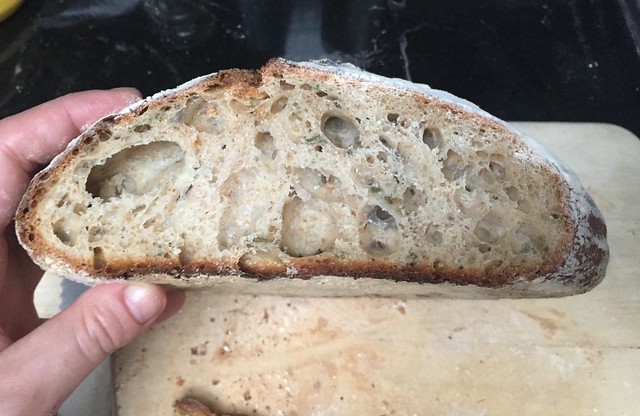
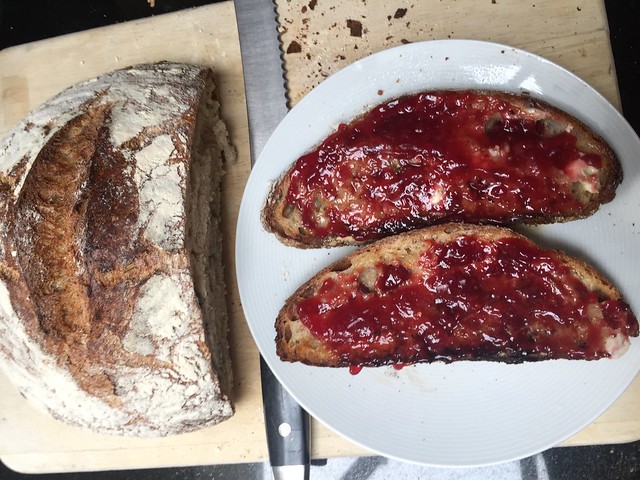
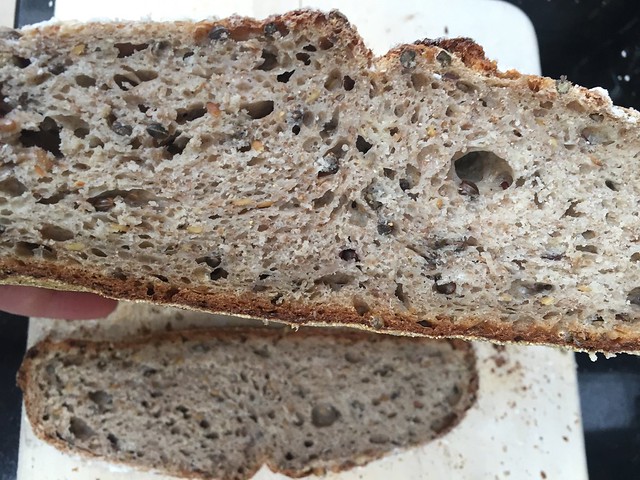
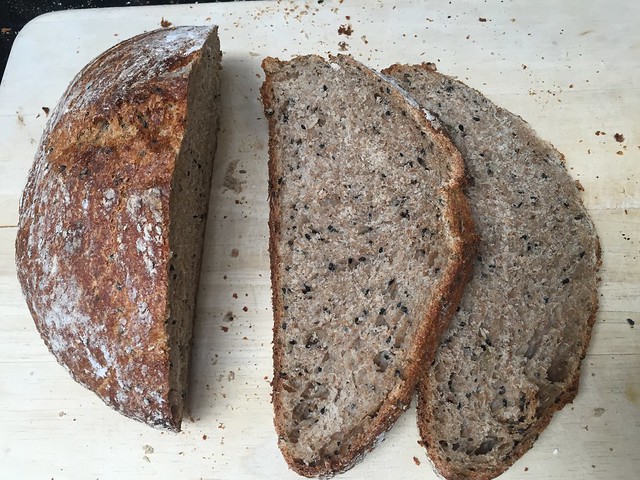
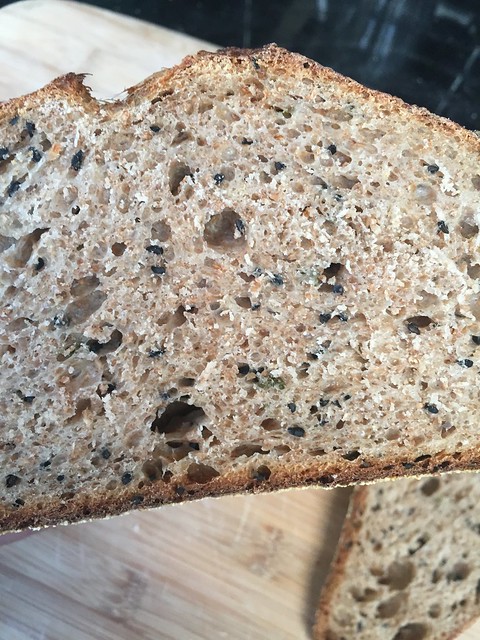
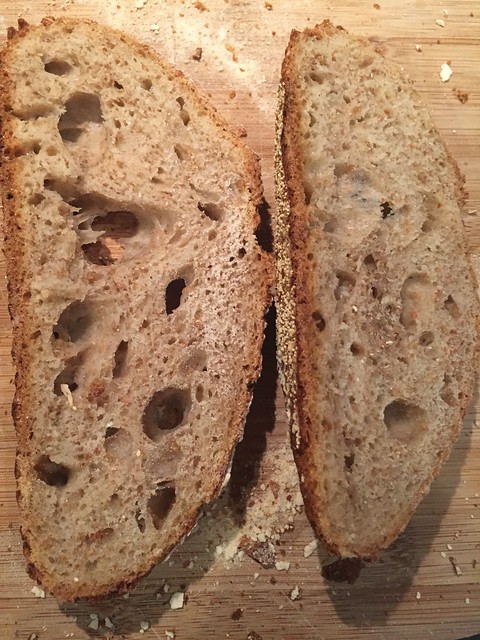
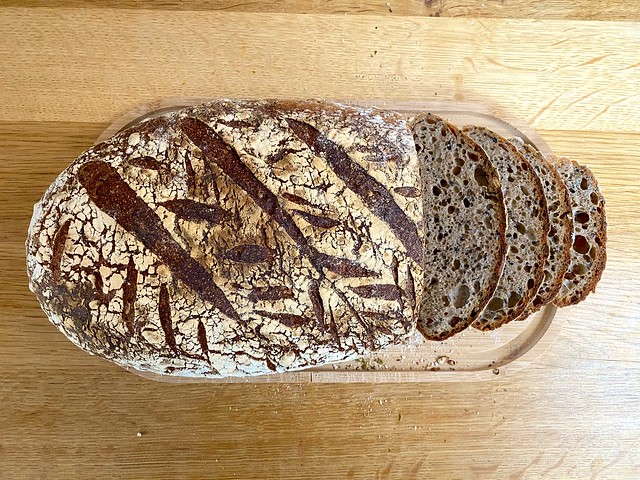
I also made this seeded rye sourdough. This is an absolutely lovely loaf, in fact this might be one of my favourites. This makes quite a large loaf so had to use a large banneton (a bread proofing basket). It was also too big for my dutch oven so used a pizza stone instead. To make sure the oven was humid enough I used two small loaf tin filled with water.

IMG_7170

Ingredients:

  • 100 g whole grain bread flour
  • 250 g white bread flour
  • 105 rye
  • 200 g water
  • 100 g milk
  • 175 g starter
  • 25 hemp seeds
  • 50 g pumpkin & sunflower mix seeds
  • 20 g nigella seeds
  • 10 g flax seeds
  • 5 g caraway seeds
  • 125 g boiling water
  • 15 g of salt

recipe:

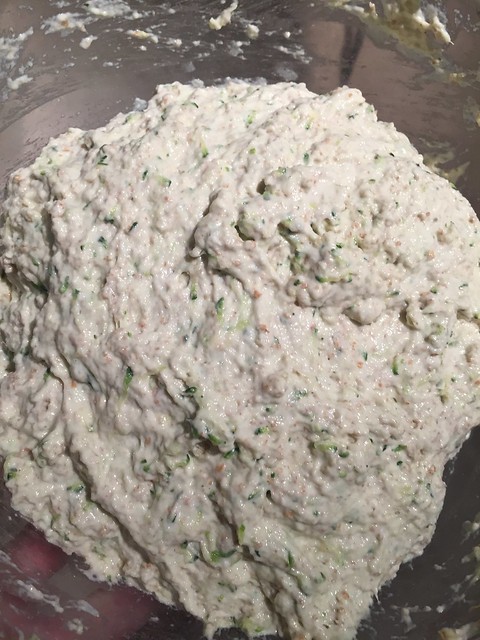
  1. mix the water +milk + starter + half of the flour. Let it sit for 45 min.
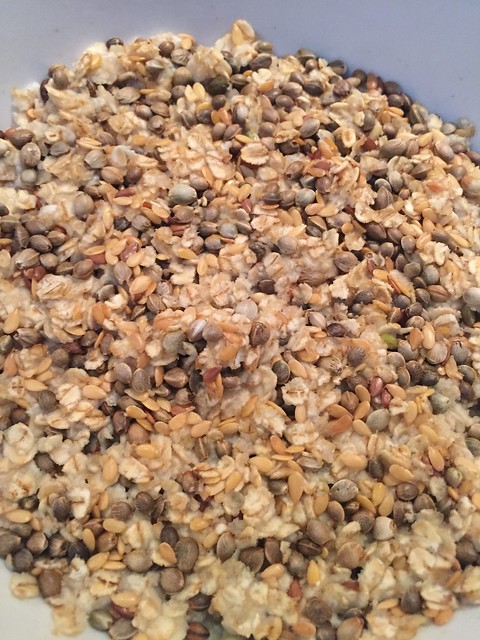
  2. In a separate bowl add and mix all the seeds and pour boiling water over it and let it sit for 45 min.
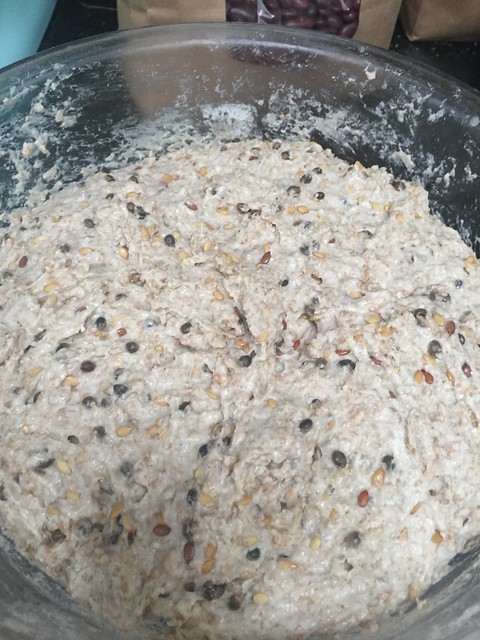
  3. Add the rest of the flour +salt +soaked seed mix to your dough let it rest for 10 min.
  4. Fold 4 times every 30 min.
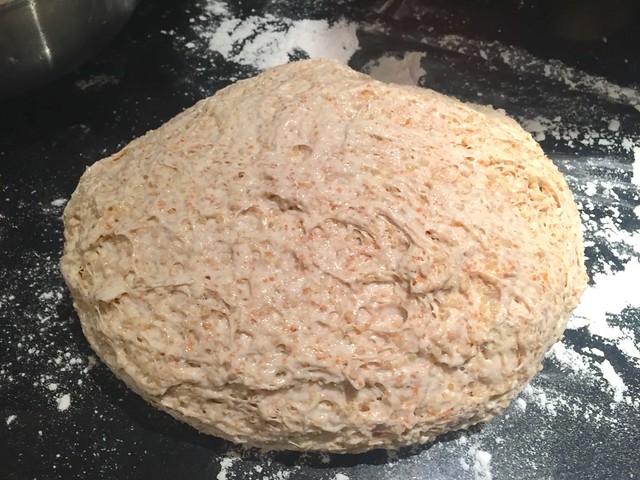
  5. Final fold and shape – you want to form in a ball and pinch the fold together. Turn the dough so that pinched fold are on your working surface and light pressing down twisting the dough so that it becomes taught.
  6. Flour well a large banneton and place the dough in it.
  7. Final bulk rise –about 8 hours depending on temperature. I quite leaving overnight somewhere cool.
  8. Preheat the oven to 240C with the pizza stone and two small tin loaves filled with water. Once the oven reaches temperature leave it another 30min to make sure the pizza stone is heated through.
  9. Taking out the dough – Cut and place baking paper over a cutting board and place it on top of the banneton. Holding together the cutting board, baking paper and banneton quickly invert it.
  10. Slash your the top and place it on the pizza stone as quickly as possible.
  11. Bake for 45 min at 240C and the last 15 min at 180C at until the top is a deep dark brown.
  12. Take it out of the oven and let cool completely.

IMG_7154

No knead olive bread

Sorry been a little lazy with posting, have been taking full advantage of the lovelier summer. This has included fruit and veg picking in the country side, going to lavender fields, growing avocados, and some flying trapeze as well as just sitting in sun in a pub garden.

But here is the no knead version of my precious olive bread recipe.

2

Came out very well with a nice crumb. The bit of red is because I use the Waitrose stuffed green olive but you can use normal black or green olives.

Ingredients:

  • 400 g whole grain bread flour
  • 500 g white bread flour
  • 500 g water
  • 200 g starter
  • 115 g olives
  • 25 g olive brine
  • 50 g olive oil
  • 20 g of salt

recipe:

  1. mix the water and flour slowly until just incorporated – Autolyse for 1 hour
  2. Add starter +salt +olives + olive oil, let it rest for 10 min
  3. Fold 6 times every 20 min. When folding use olive oil on your hands not only moisturise the hands but also keeps the dough from sticking.
  4. 1st rise – oil the bowl, or use a clean to well
  5. Folding and proofing – divide the dough in two and shape two balls. Let it proof for about 20 hours in the fridge.
  6. Final bulk rise – take out the dough out of the fridge and at room temperature for about 2 hours. Preheat the oven at 260C˚ the Dutch Oven(I have a Le Creuset pot).
  7. Slash the top and Bake at 260C˚ for about 20mins with the lid on. Lower the temperature to 190C˚ for another 30min.
  8. Take it out of the oven and let cool for a couple hours.

Quinoa sourdough no knead

I found a new game for my leftover cooked grains called “does it sourdough?” and yes, quinoa is lovely in sourdough.

1

Next stop is going to be couscous I think, alway cook too much of the stuff. Ohh with maybe tahini?…. Anyways.

Recipe notes – I also been adding a bit of milk with the dough for the last couple of loaves. A couple people that I know don’t like sourdough because they feel it is too “chewy”. I slightly understand what they mean. Sourdough compared to supermarket normal sliced white loaves can have a bit more chew to them. I have observed though adding a bit of milk really soften the crumb of the bread. This loaf recipe is also on the more liquid side, which at the moment I am favouring. As you can see below. It is a bit harder for it to properly shape it just slightly slumps.
IMG_6625

Adding thyme would have been a nice touch but I killed my thyme plant within a week of buying one. But still hopeful it is just in very deep hibernation will miraculously resurect (after all Easter Monday is coming up). But anyways no thyme at the moment.

And finally I made one huge Bannaton, so if you are making two medium boules adjust the baking time.

Ingredients

  • 350g water
  • 22g salt
  • 160g starter
  • 500g white bread flour
  • 250g wholemeal bread flour
  • 70g milk
  • 250g cooked quinoa

Recipe

  1. In a small cup add 22g of hot water and dissolve the salt. Leave to cool.
  2. In a large bowl add water + milk+ the starter and mix to dissolve.
  3. + add all the flour + quinoa+ the now tepid 22g salt water 
  4. Mix until combined
  5. Cover with a plastic freezer bag and leave in the fridge for 20 hours.
  6. Scoop out your dough on a clean floured surface and shape your dough and put it in a bread proofing basket.
  7.  And leave the dough at room temperature for another 2 hours. Preheat the oven at 260C˚ with the Dutch Oven inside. Leave the dutch oven for a least 30 min at 260C˚.
  8. Slash the top and Bake at 260C˚ for about 45mins with the lid on. Take off the lid and lower the temperature to 230C˚ for another 20min.
  9. Take it out of the oven and let cool for an hour.

IMG_6673

Sourdough Brioche 2017- que ce que ça cloche!

Brioche time. Brioche is basically super rich bread with eggs and butter. Sourdough brioches are pretty to easy to make but they do require time and patience. This recipe is not too sweet as it uses honey. You can use 35 grammes of sugar instead.  The inspiration for the recipe is from here and here.

I haven’t made brioche since last year. Last year I used orange sugar which I think was a nice touch and really the only redeeming feature of the brioches that I made. Looking back on the post there has definitely been great strides and progress made in 1 year.

brioche1

This year brioches are definitely looking a lot better and are much fluffier and just much more brioche-y.

IMG_6608

This recipe’s use of butter is definitely reminiscent of the chef Gary Rhodes whose oft-repeated phrase is add another spoon of butter.

Eggwash notes: I used the egg white and milk for convenience since the recipe calls for one yolk. But if you want a different effect on the brioche you can go to epicurious or cooksinfo website that really get into the ins and out of all the different types of eggwash.

Ingredients

  • 230g bread flour
  • 270g all purpose flour
  • 50g honey
  • 10g salt
  • 3 eggs + 1yolk eggs
  • 250g starter
  • 275g room temperature butter
  • 225g milk
  • 1/2 zest of lemon

Recipe

  1. Cut the butter in small 1cm pieces and leave out to soften
  2. Mix all ingredient in a bowl except the butter –  milk + lemon zest +honey+ eggs+ flour + starter. Keep the egg white from the 4th egg as you will use it later for the egg wash
  3. Mix well, let it rest for 15min and mix well again.
  4. +butter. Mix gently until all the butter is incorporated. You should massage it in but I ended up mixing it in the kitchen aid and it seem to be alright. The dough should have a nice shine to it.
  5. Put in a covered container and leave in the fridge to rise for 24 hours.
  6. On a lightly floured surface shape the dough and in your baking tins.
  7. Final rise should be at room temperature for 3 hours.IMG_6616IMG_6619
  8. preheat the oven at 215Cº.
  9. prepare the egg wash 3 tablespoons of milk + egg white and mix vigorously.
  10. gently brush the egg wash on the brioche dough.
  11. Bake for 25min for medium shape brioche, until the top are nice and golden brown.brioche raising

Tadah!

brioch 2

No knead rosemary polenta bread

Gotten slightly obsessed with polenta this week for some reason. Maybe its spring and the weather turning around, and polenta is light but comforting. Anyways the perfectloaf, which is a fantastic and beautiful​ little website, has the most amazing but slightly intimidating bread recipes. I took inspiration from its great rosemary and polenta bread post. They also have a great pizza dough recipe that looks marvellous​​ but bit too complicated for me at the moment.

Anyways had some leftover polenta for dinner and guessed what happens to leftover/ food going off? Bread time!

1
It’s not bad, quite enjoyed it toasted​ with a bit of butter and blackberry jam. Decent​ airy-ness as well as good crumb and texture.

Quick note – this recipe uses cooked polenta. Here is Felicity Cloaks polenta recipe as part of her how to make the perfect…. column. I am not going to lie to you, polenta is a bit of a faff to cook. I have used uncooked polenta in the past to bake bread, but I think the polenta doesn’t quite cook through. The bread ends up a bit gritty from what I remember.

Recipe makes 2 medium boules

Ingredients

  • 550g white bread flour
  • 250g wholemeal flour
  • 335g water
  • 120g starter
  • 22g salt
  • 180 g cooked polenta
  • 100g milk
  • handful rosemary

Recipe

  1. In a small cup add 10g of hot water and dissolve the salt. Leave to cool.
  2. In a large bowl add water + milk+ the starter and mix to dissolve.
  3. + add all the flour + polenta+ rosemary+ the now tepid 10g salt water 
  4. Mix until combined
  5. Cover with a plastic freezer bag and leave in the fridge for 20 hours.
  6. Scoop out your dough on a clean floured surface and shape your dough. With the seams bottom down, push and rotate your shaped dough to really close the seams.
  7.  And leave the dough at room temperature for another 2 hours. Preheat the oven at 260C˚ with the Dutch Oven inside. Leave the dutch oven for a least 30 min at 260C˚.
  8. Slash the top and Bake at 260C˚ for about 35mins with the lid on. Take off the lid and lower the temperature to 230C˚ for another 15min.
  9. Take it out of the oven and let cool for an hour.

Bons Bake!IMG_6480

No Knead Courgette sourdough Bread

Been wanting to redo the beetroot bread I did ages ago unfortunetaly I missed the season and so no beetroots until July here in the UK. Until then maybe I could try hibiscus sourdough bread at some point to get my red bread fix.

Anyways today instead I decided to experiment as well as celebrate the end of the dire courgette shortage we’ve been having with courgette sourdough bread. I more or less use the same recipes as the beetroot bread, but because courgette is much more watery, I added some wholemeal flour.

I slightly miss the bright red dough from when I make beetroot bread; the courgette bread dough is looking much more civilised, lot less murdery.

IMG_6341IMG_6343

There isn’t a taste of courgette per se, but it has this really nice freshness and it super soft and moist.

IMG_6358

As you can sort of see the texture and crumbs of it was really lovely, it is just light and airy.

It pairs especially well with savoury food. I had it with some gorgonzola which really brought out the flavours.I then proceeded to eat the entire humongous piece gorgonzola and half of the loaf which was not the greatest decision but super delicious nonetheless. And when life gives you a bad but delicious option, you take that option my fellow epicurean.

so all in all actually really happy with this bread even though it does not have a fantastic lurid hue of the beetroot bread.

Ingredients

  • 550g white bread flour
  • 100g wholemeal flour
  • 335g water
  • 200g starter
  • 15g salt
  • 1 medium courgette

Recipe

  1. In a small cup add 10g of hot water and dissolve the salt. Leave to cool.
  2. With a grater finely shred the courgette and set aside for the moment.
  3. In a large bowl add water + the starter and mix to dissolve.
  4. + add all the flour + courgette + the now tepid 10g salt water 
  5. Mix until combined
  6. Cover with a plastic freezer bag and leave in the fridge for 20 hours.
  7. Scoop out your dough on a clean floured surface and shape your dough. Withe the seams bottom down, push and rotate your shaped dough to really close the seams.
  8.  And leave the dough at room temperature for another 2 hours. Preheat the oven at 260C˚ with the Dutch Oven inside. Leave the dutch oven for a least 30 min at 260C˚.
  9. Slash the top and Bake at 260C˚ for about 30mins with the lid on. Take off the lid and lower the temperature to 230C˚ for another 15min.
  10. Take it out of the oven and let cool for an hour.

No Knead seeded oatmeal sourdough

I have just totally given up on kneading. So this loaf is a no-knead variation of the seeded multigrain that I have done earlier. I also took a bit of inspiration from Ginger&bread’s rye and spelt recipe, those rye berries look really great.

I used unhulled hemp seed because I bought way too much and never used them. I have no idea in fact why I originally bought them. Unhulled hemp seeds are a bit weird, super hard and just no recipe uses them. They do work really well with this bread.

IMG_6186IMG_6191


The soaker ingredient after 30 min. The longer you leave them to soak the better. Soaker ingredients really pop up once mixed in the dough.


The combination of the hempseed and linseed with the oats and the rye flour really makes this loaf hearty and delicious.

IMG_6265

The bread is still quite bubbly. The texture and taste of it is really enjoyable. The hempseed and linseed gives it a pleasurable crunch.

Soaker ingredients

  • 85g hemp seed and linseed
  • 70g oats
  • 90g hot boiling water

Final Dough Ingredients

  • 350g water
  • 180g starter
  • 240g white bread flour
  • 100 wholemeal flour
  • 175g rye flour
  • 12g salt
  • soaker ingredients

Recipe

  1. In a small bowl mix all the soaker ingredient and leave for at least 30min 
  2. In a small cup add 10g of hot water and dissolve the salt. Leave to cool.
  3. In a large bowl add the rest of the water + the starter and mix to dissolve.
  4. + add the flour + soaker ingredient + the now tepid 10g salt water 
  5. Mix until combined
  6. Cover with a plastic freezer bag and leave in the fridge for 20 hours.
  7. Scoop out your dough on a clean floured surface shape your dough. The seams bottom down, push down and rotate your shaped dough to close the seams on the bottom.
  8.  And leave the dough at room temperature for another 2 hours. Preheat the oven at 260C˚ with the Dutch Oven inside. Leave the dutch oven for a least 30 min at 260C˚.
  9. Slash the top and Bake at 260C˚ for about 30mins with the lid on. Take off the lid and lower the temperature to 230C˚ for another 15min.
  10. Take it out of the oven and let cool for an hour.

No knead Lemon thyme and nigella seeds basic sourdough

Continuing my little love affair with no knead sourdoughs, I sort of back testing all my old recipe with the no knead method. This is absolutely fantastic, it is so quick to basically dump all the ingredients and do nothing (which is really what I do best). I am seeing the no knead light and running towards it.

So the “bakers percentage” which is basically the proportions of all the ingredients is the same as the rosemary loaf that I made a while back. I changed rosemary to lemon thyme (using what herbs I had in the fridge) and nigella seed (bought a huge bag for really cheap from a local Lebanese shop). These have both a light lemon zing taste that a very subtle to the bread.

IMG_6260

I alos switch percentage betweem the wholemeale and white flour (was running out of white flour). This made it much more of a wholemeal bread. and so it is a much heavier bread but still really lovely and full of taste.

IMG_6254


A bit of close up and you can see bubble and holes everywhere. So this is a denser bread.


Ingredients

  • 380g water
  • 100g sourdough starter
  • 400g of stoneground whole wheat flour
  • 100g organic strong white flour
  • 10g (1 Tbsp) salt
  • 2 sprigs of Rosemary
  • 2tbsp of nigella seeds

Recipe

  1. In a small cup add 10g of hot water and dissolve the salt. Leave to cool.
  2. In a large bowl add 370g of water + the starter and mix to dissolve.
  3. + add the flour + nigella seeds + thyme + the now tepid 10g salt water 
  4. Mix until combined
  5. Cover with a plastic freezer bag and leave in the fridge for 20 hours.
  6. Scoop out your dough on a clean floured surface shape your dough. The seams bottom down, push down and rotate your shaped dough to close the seams.
  7.  And leave the dough at room temperature for another 2 hours. Preheat the oven at 260C˚ with the Dutch Oven inside. Leave the dutch oven for a least 30 min at 260C˚.
  8. Slash the top and Bake at 260C˚ for about 30mins with the lid on. Take off the lid and lower the temperature to 230C˚ for another 15min.
  9. Take it out of the oven and let cool for an hour.

No knead workhorse loaf

Continuing my adventure in no knead land. I thought would the no knead method work for any sourdough recipe? Decided to put the workhorse loaf to the test.Using the same recipe proportion (cut it half to make only one loaf in case it all went belly up) but applying the no knead method. Conclusion is a most definitive yes you can!

IMG_6155

So here is no knead workhorse bread.

Ingredients:

  • 300g     White bread Flour
  • 150g       Whole Grain flour
  • 225g         Water
  • 100g        Starter
  • 10g            Salt

Recipe

  1. In a small cup add 10g of hot water and dissolve the salt. Leave to cool.
  2. In a large bowl add 215g of water + the starter and mix to dissolve.
  3. + add the flour + the now tepid 10g salt water 
  4. Mix until combined
  5. Cover with a plastic freezer bag and leave in the fridge for 20 hours.
  6. Scoop out your dough on a clean floured surface shape your dough. The seams bottom down, push down and rotate your shaped dough to close the seams.
  7.  And leave the dough at room temperature for another 2 hours. Preheat the oven at 260C˚with the Dutch Oven inside. Leave the dutch oven for a least 30 min at 260C˚.
  8. Slash the top and Bake at 260C˚ for about 30mins with the lid on. Take off the lid and lower the temperature to 230C˚ for another 15min.
  9. Take it out of the oven and let cool for an hour.

This is amazing. I don’t think I am ever kneading dough ever again. I mean look at those holes and crumbs!

IMG_6160IMG_6158

Who needs to knead? No knead sourdough

The kneading of the sourdough at 20 min interval for so many time is alway the most time-consuming and annoying part (I get flour and dough everywhere in the kitchen). I had heard about no knead technique, but I had a slight suspicion that it was mostly to make pun-ny book titles like “kneadlessly simple” and the title to this post. It is also the least used methods in sourdough recipes that I have seen. Although it’s a great for people who dont have a proofing basket as you don’t need one for this no knead recipe as the dough rises in a mixing bowl.

The biggest contention with no knead is the flavour. Many argue that it doesn’t taste as good, as the flavour has less depth. I slightly agree with that the no knead method did not taste bad but it was different, a bit more like normal white bread…. Here is a post that argues why kneaded bread is better not only because of the taste but other points I hadn’t thought about. I think though it is mostly comes down to personal preference. I am definitely going to try some more no knead breads.

The best book for the no knead method is My Bread: The Revolutionary No-Work, No-Knead Method by Jim Lahey and Rick Flaste. Also for a bit more science and why the no knead method works a post can be found at serious eat. Or also on here, Bodnant welsh food website, which also did two loaves to compare kneading vs no knead. Basically, the dough as it rises kneads itself. Also what is crucial is that you use a dutch oven.

But it actually works! You don’t need to knead! I used the New York Times recipe and to see if it made any difference as a comparison I also made my workhorse loaf recipe which is very similar. I made two different loaves with my workhorse recipe and kneaded them to different degrees. I kneaded one loaf with 20 min  4 times and another 8 times. The best result was kneading it 4 times at 20 min intervals (which is what the standard practice seems to be in most recipes). Kneading it 8 times did not make any difference to the loaf compared to kneading it 4 times.

Here are the loaves just out of the oven

IMG_6037

The left is 4 times, the bottom middle is no knead and the right is 8 times
IMG_6047

here is an intersection of all three of the loaves. Can you tell which is which?

A couple thing I have discovered and have started to do is: one dissolve the salt in 15grams of water from the recipe and dissolving the starter in the water before adding it to the flour which makes everything easier to mix. I also have started using plastic bags to cover the dough while its rising which is really good to prevent the bread from drying out. After shaping  I have also started to twist the bread on itself on to close the seems on the bottom.

Ingredients

  • 300 grams white bread flour
  • 125 grams wholemeal bread flour
  • 300 grams water
  • 180 grams starter
  • 6 grams salt

recipe

  1. feed your starter 8 hours before.
  2. In a cup with 10 grams of hot water add the salt and mix to dissolve.
  3. With the rest of the water at luke warm temparature add the starter and mix.
  4. add the flour and the cup of salty water to water/starter mixture and mix until combined.
  5. Wrap the bowl using a plastic freezer bag or cling film.
  6. let it rise for 24 hours in the fridge
  7. On a well floured surface scoop out the dough and fold and shape into a loaf.
  8. Leave the dough for 2 hours for its final rise.
  9. Heat the oven to 260Cº and place your dutch oven inside for 30 in.
  10. Put your loaf in the dutch oven seams up.
  11. Bake for 30 min at 260Cº and take the top of and cook at 245Cº for another 10 min.
  12. take the bread out and leave to cool for 45 min at least